How to Install Elasticsearch on Ubuntu 24.04? (Elasticsearch Installation)
Elasticsearch is an open-source search and analytics engine built on Apache Lucene. Known for its speed and scalability, it handles JSON-based queries and delivers results within milliseconds, making it perfect for search and data analysis tasks.
Unlike traditional databases that use tables, Elasticsearch organizes information as key-value documents. It plays a central role in the ELK Stack (Elasticsearch, Logstash, Kibana) for indexing and managing large datasets.
In this guide, you’ll learn how to install Elasticsearch on Ubuntu 22.04 server and work with data using its REST API.
Prerequisites
Before setting up Elasticsearch on Ubuntu, make sure you meet the following requirements:
- An Ubuntu 22.04 server with a minimum of 2GB of RAM and 2 virtual CPUs.
- SSH access to the server is provided by a user account that has sudo privileges.
Installing Elasticsearch on Ubuntu 24.04
There are three main methods to install Elasticsearch on Ubuntu:
- Using the apt package manager
- Setting it up manually from a .tar.gz archive.
- Installing it from a .deb package file.
Method 01: Installing Elasticsearch on Ubuntu using the Apt Package Manager (Elasticsearch Installation)
When you install Elasticsearch through the Debian repository, the apt package manager takes care of handling dependencies and future updates automatically. This method is convenient, but it does limit you to the versions provided in the official Elasticsearch repository.
Follow the steps below to install Elasticsearch using this approach.
1. Add the Elasticsearch Repository
First, you need to add the Elasticsearch repository and its GPG key to your system to ensure package authenticity.
Open your terminal and run the following command to download and save the GPG key securely:
wget -qO - https://artifacts.elastic.co/GPG-KEY-elasticsearch | sudo gpg --dearmor -o /usr/share/keyrings/elasticsearch-keyring.gpg
Next, add the Elasticsearch repository to your system’s apt sources list:
echo "deb [signed-by=/usr/share/keyrings/elasticsearch-keyring.gpg] https://artifacts.elastic.co/packages/8.x/apt stable main" | sudo tee /etc/apt/sources.list.d/elastic-8.x.list

Note: This example uses the 8.x release series, which was the latest at the time of writing. Be sure to update the version if a newer one is available.
2. Install Elasticsearch on Ubuntu
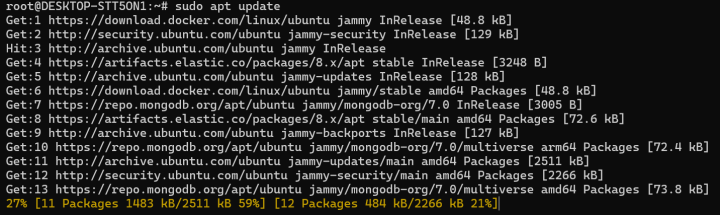
Once the repository is added, refresh your package list:
$ sudo apt update
Now, install Elasticsearch on Ubuntu by running:
$ sudo apt install elasticsearch

The package manager will download and install Elasticsearch, including all necessary dependencies. The installation may take a few minutes.
3. Enable and Start the Elasticsearch Service
After installation, you need to manually start the Elasticsearch service and set it to launch automatically at system boot.
First, reload the systemd configuration:
sudo systemctl daemon-reload
Enable Elasticsearch to start on boot:
sudo systemctl enable elasticsearch.service
Then, start the service:
sudo systemctl start elasticsearch.service
Important: If you're using Ubuntu under Windows Subsystem for Linux (WSL), systemd commands won't work. Instead, manage the service with:
sudo service elasticsearch start

sudo service elasticsearch stop

sudo service elasticsearch restart
4. Verify Elasticsearch Status
Finally, check if the Elasticsearch service is running properly:
sudo systemctl status elasticsearch.service
If everything is working correctly, you’ll see the service marked as active along with details about its running state and tasks.
Method 02: Install Elasticsearch on Ubuntu Manually from the Elastic Archive
You can manually install Elasticsearch by downloading its compressed archive file from the official Elastic website. While this method involves a few extra steps, it gives you greater flexibility and control over the installation process.
1. Download the Elasticsearch Archive
Use the wget command to download the latest Elasticsearch tar.gz file:
wget https://artifacts.elastic.co/downloads/elasticsearch/elasticsearch-8.15.0-linux-x86_64.tar.gz
This command downloads version 8.15.0 of Elasticsearch. If you want a different version, make sure to update the link accordingly.
2. Extract the Archive
Next, extract the downloaded archive using:
tar -xzf elasticsearch-8.15.0-linux-x86_64.tar.gz
This will create a folder named elasticsearch-8.15.0 in your current directory, containing all the files required to run Elasticsearch.
3. Move Elasticsearch to a Standard Directory
For better organization, move the extracted directory to a more appropriate location like /usr/local/:
sudo mv elasticsearch-8.15.0 /usr/local/elasticsearch
4. Start Elasticsearch
To launch Elasticsearch manually, run:
/usr/local/elasticsearch/bin/elasticsearch
This command will start Elasticsearch in the foreground, and you'll see the logs output directly in your terminal.
If you prefer to run it in the background, add the -d option:
/usr/local/elasticsearch/bin/elasticsearch -d
Running it this way allows you to keep using your terminal while Elasticsearch continues running in the background. Reload the systemd manager so it recognizes the new service:
sudo systemctl daemon-reload
Enable the service to start automatically when the system boots:
sudo systemctl enable elasticsearch.service
Finally, start the Elasticsearch service:
sudo systemctl start elasticsearch.service
6. Confirm Elasticsearch is Running
To verify that Elasticsearch is active and running correctly, check its service status:
sudo systemctl status elasticsearch.service
You should see that the service is active and running without errors.
Method 03: Install Elasticsearch on Ubuntu Using a Debian Package
Another way to install Elasticsearch on Ubuntu is by using a .deb package. This method is simple and quick, but requires manually handling updates without the help of a package manager like apt.
1. Download the Elasticsearch Debian Package
First, use wget to grab the latest .deb package:
$ wget https://artifacts.elastic.co/downloads/elasticsearch/elasticsearch-8.15.0-amd64.deb
To verify the file’s integrity, download its SHA-512 checksum:
$ wget https://artifacts.elastic.co/downloads/elasticsearch/elasticsearch-8.15.0-amd64.deb.sha512
Then, check the file’s validity:
$ shasum -a 512 -c elasticsearch-8.15.0-amd64.deb.sha512
If the file is valid, you'll see an "OK" message.
2. Install Elasticsearch on Ubuntu
Install the downloaded package using dpkg:
$ sudo dpkg -i elasticsearch-8.15.0-amd64.deb
If any dependency errors occur, fix them by running:
$ sudo apt install -f
This will install any missing dependencies automatically.
3. Start and Enable the Elasticsearch Service
Set Elasticsearch to start on boot:
$ sudo systemctl enable elasticsearch.service
Then manually start the service:
$ sudo systemctl start elasticsearch.service
Check the service status to ensure everything is working:
$ sudo systemctl status elasticsearch.service
If the service is active, the Elasticsearch setup is installed correctly.
Test Elasticsearch Installation
By default, Elasticsearch runs on port 9200. To confirm it’s up and running, send a simple GET request using curl:
curl -X GET 'http://localhost:9200'
If everything is set up correctly, you’ll receive a JSON response showing server information.
For a more detailed view of the Elasticsearch node, use:
curl -X GET 'http://localhost:9200/_nodes?pretty'
The “?pretty” option makes the output easier to read.
Conclusion
In this guide, you learned how to install Elasticsearch on Ubuntu through various methods, set up basic configurations, and confirm that the service is running smoothly. To explore more information about Elasticsearch configurations and curl commands, refer to the Elasticsearch Official documentation.
Unlock the true potential of your website with 10GBVPS! Experience blazing-fast performance, unlimited bandwidth, and zero overage fees, giving your site the freedom to grow without limits. With server locations across the globe, 10gbvps ensures optimal speed, reliability, and a seamless experience for your visitors. Power up your hosting with 10GBVPS — where speed meets freedom!
Blog